With the IMS OnArrival mobile application, patients can check in to a clinic in various ways and perform the necessary check-in procedures. The patients can also sign forms, verify demographics and insurance details, and store images of their insurance cards.
To check in to a clinic, follow these steps:
My bad-debt write-offs have been reduced over 90%. Pre–IMS, we had an average of $80,000 per month outstanding in charges waiting for referral. Since implementation of IMS we now regularly maintain no more than $400 per month. The Authorization tracking screen helps us in timely follow-up with the insurance companies. The billing module is great, in a way we now know what ensures timely payments. The aging reports help our billers set priority of follow-ups, making sure we work in the right areas.
Mid Michigan Cardiology Associates
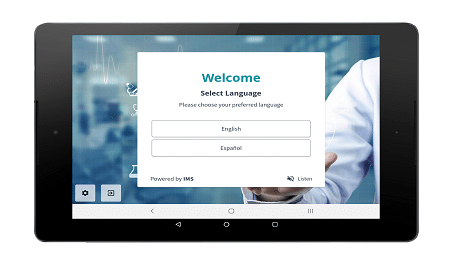
Select Language Screen
On the home screen of IMS OnArrival, the patient taps his or her preferred language, and then taps the type of visit.
Note: In IMS OnArrival Version 21, if the patient chooses Spanish as his or her preferred language, the Spanish version of the form appears on the Forms screen only if the Spanish version of the form is set up in IMS. In addition, the battery percentage of the device appears in the top-right corner of the home screen.
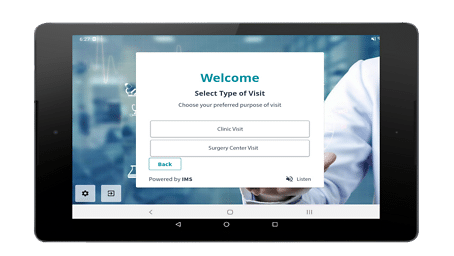
Select Type of Visit Screen
In Select Type of Visit, the patient taps the applicable type of visit.
Note: The patient can tap Listen in the lower-right section to have the text on the screen read aloud.
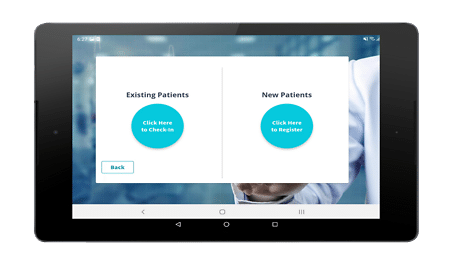
Patient Check-In Screen
On the Patient Check-In Screen, the patient taps Click Here to Check-In, to check in as an existing patient or Click Here to Register to check in as a new patient.
Note: If the patient selects Click Here to Register the patient will be directed to the Meditab Intelligent Assistant screen
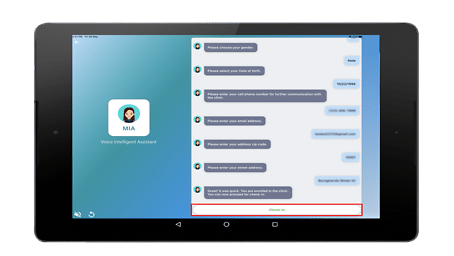
Voice Intelligent Assistant Screen
If the patient selects “New Patient – Click here to register” the Voice Intelligent Assistant screen will be displayed. The patient enters his or her answers to the questions. After the patient enters the necessary patient details, he or she taps Check-in.
Note: After entering the necessary details on the Voice Intelligent Assistant screen, the patient can either check in to the clinic or exit from the screen. If the patient proceeds to check in, the office where the patient is checked in and his or her assigned provider are automatically set to the default office and provider that are selected in IMS OnArrival.
In IMS OnArrival, patients can sign in using their IMS CarePortal credentials, a barcode sticker, or their names and birth dates depending on the sign-in method that is set up in IMS. To check in to a clinic, the patient follows these steps:
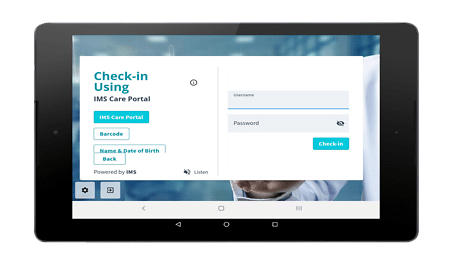
Check-in Using IMS Care Portal Screen
If the patient selects “Existing Patient – Click here to Check-In” the Check-in Using IMS Care Portal screen will be displayed. On the Check-in Using IMS Care Portal screen, the patient can check in with the following method:
- Tap Care Portal Credentials, and then sign in using IMS CarePortal credentials.
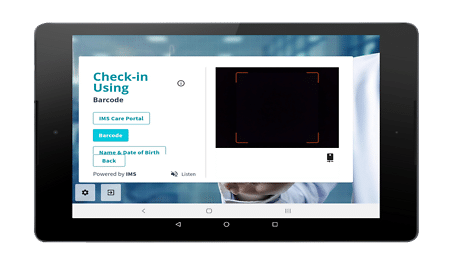
Check-in Using Barcode Screen
Existing Patients can check in with the following method:
- Tap Barcode, and then scan the barcode sticker that is provided by the clinic.
Check-in Using Name & Date of Birth Screen
Existing Patients can check in with the following method:
- Tap Name & Date of Birth, and then sign in using the patient’s name and date of birth.
Note: When the patient taps Name & DOB on the sign-in screen, the patient can now enter his or her date of birth (DOB) manually. When the Login using Name and DOB screen opens, the patient types his or her name, and then enters his or her DOB in MM/DD/YYYY format in the DOB (MM/DD/YYYY) box. The patient can also tap the calendar symbol in DOB (MM/DD/YYYY) to open the calendar window where the patient can specify his or her DOB.
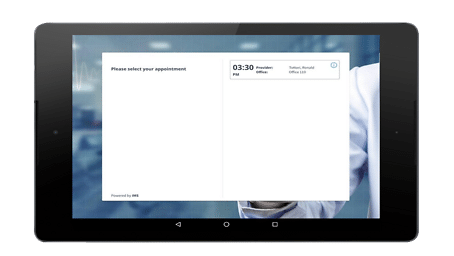
Appointment Screen
On the appointment screen, the patient taps the applicable appointment.
Note:
- The patient can also tap the information symbol for the applicable appointment to open the Appointment Details window where he or she can view the rest of the details of the appointment.
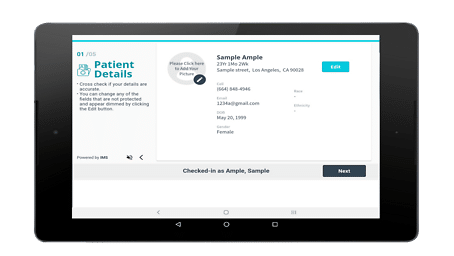
Patient Details Screen
On the Patient Details screen, the patient reviews his or her details that are saved in the system and then taps Next
Note: If the patient wants to update the details, he or she taps Edit. For more information about how to update the details, see Update a patient’s information.
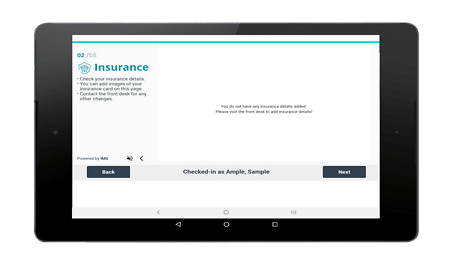
Insurance Screen
On the Insurance screen, the patient reviews the insurance details and then taps Next.
Note: If the Insurance Card is not on file or needs updating, it is necessary to contact the front desk staff. Once promoted the patient or staff can take and save photos of the front and back sides of the insurance card by tapping Add Image. In the window that opens, the patient taps either Take photo of the front side or Take photo of back side to open the camera application where he or she can take photos of the insurance card.
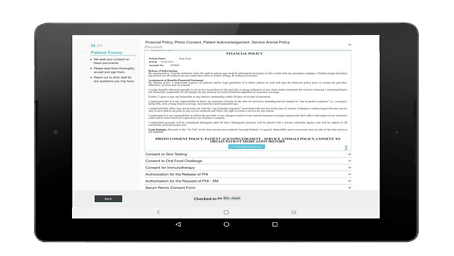
Patient Form Screen
With IMS’ Ambulatory Surgery Labs & Diagnostic module submit lab orders and diagnostic tests electronically and track results directly through your EMR. Receive a notification as soon as results are received and quickly file them in the patient’s chart.
- On the Patient Forms screen, the patient does the following:
- The patient taps the applicable document.
- The patient reviews the content, and does any of the following:
- Tap I Understand and Accept to accept the current form.
- Sign the form.
- Tap Skip to skip the current form.
The patient taps Save & Next to save the documents and proceed to the next screen
Note: Forms marked as Required do not have the Skip button. Accepted or skipped forms show the Accepted or Skipped status. If the Guardian Forms screen appears, the similar process is followed. The screen has the Patient Forms button, which returns the user to the Patient Forms screen.
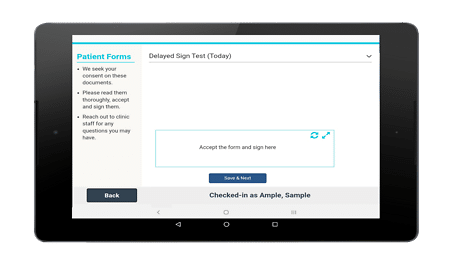
Patient Form (To be Signed) Screen
On the Forms (To Be Sign) screen, the patient accepts the forms and signs consent here.
Note: The patient cannot proceed to the next step without affixing his or her signature and without marking all required documents as accepted. Forms already signed in IMS Patient App or IMS CarePortal are marked as SIGNED on the Patient Forms screen.
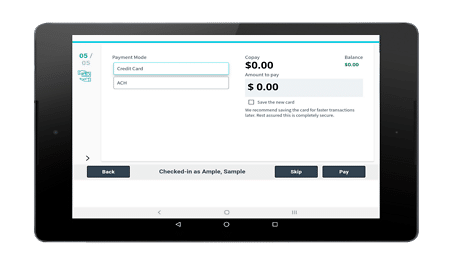
Payment Screen
On the Payment screen, the patient does one of the following:
- Tap a saved card, type the total amount in the amount to pay box, and then tap Pay.
- Enters the necessary card details to pay using a new card. Then types the applicable amount to pay.
- Enters the necessary account details to pay using Automated Clearing House (ACH). Then types the applicable amount to pay.
Note: If the patient has an IMS CarePortal account, and then pays using a saved card, the patient is required to enter his or her IMS CarePortal password. If the patient does not have an account, however, the password that the patient must enter consists of characters in his or her last name, first name, and date of birth. For more information about the password, see Pay via saved card without an IMS CarePortal account.
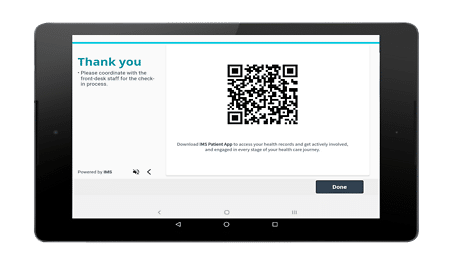
Thank You Screen
On Thank you, the patient taps Done to complete the check-in process.
Note: The patient can scan the QR code on Thank you to download IMS Patient App and automatically search for the clinic in the application.


